
Tutorial
CheerpX is very easy to use, this tutorial will guide you step by step into hosting CheerpX on your own HTTP server, and integrating it onto a HTML page that is embedding some flash content.
Prerequisites
You should already be receiving our latest releases of CheerpX for Flash. If you haven’t gotten in touch yet, feel free to contact us![]() and we’ll look to add you to our evaluation programme.
and we’ll look to add you to our evaluation programme.
You should also have contacted Harman, who will provide you with their custom binary (which is used in the virtualization process). You can contact them and ask for the libHCSFP_CX.so file that is necessary to run CheerpX.
Download and prepare CheerpX for Flash
Head to your emails and find the latest release - from here you can click the download link and receive our latest zipped build of CheerpX for Flash. The contents of the zip should look like this:
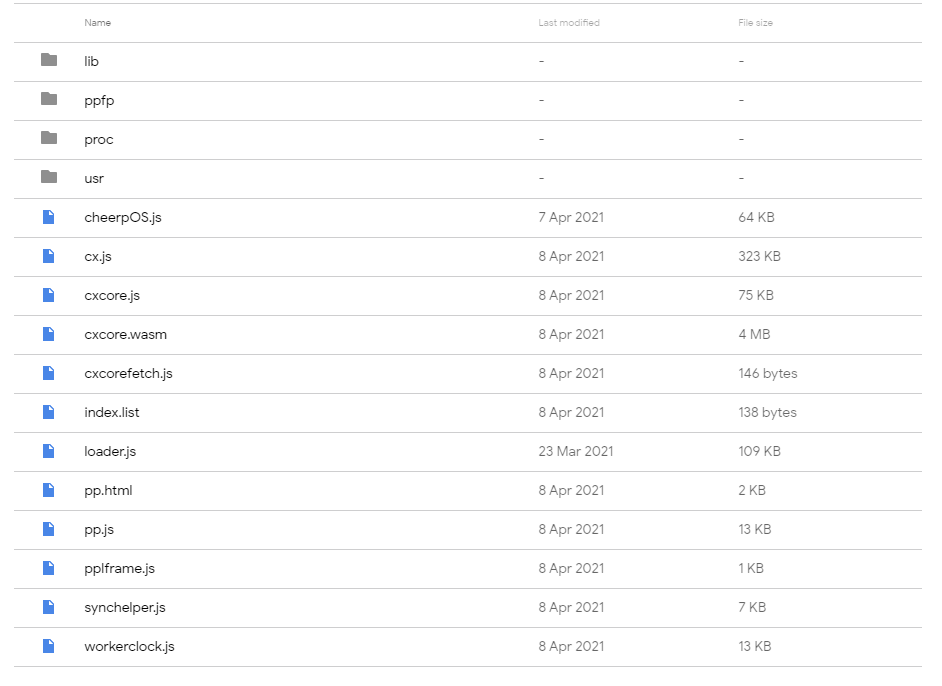
Unzip the file into a safe location. For the ease of referencing our CheerpX for Flash build, you should also rename the folder. In this example, we’ll rename our CheerpX build to ppdeploy. From here we can head inside the ppfp directory, and add our libHCSFP_CX.so file, along with the two files that ship with CheerpX for Flash, Arial and ppfp.
Once this is done, we can now setup a HTTP server and host CheerpX on it.
Install and configure your HTTP Server
CheerpX simply needs to be hosted and served to the client machine via HTTP(S). You can do this in any means that you prefer, although for this tutorial, we will use Apache on Windows, via XAMPP. Download and install XAMPP from their site here![]() .
.
You can also read more about the installation process, and configuration process in the XAMPP FAQs![]()
Once you have installed XAMPP, you can open the XAMPP Control Panel from the start menu. It should look like this:
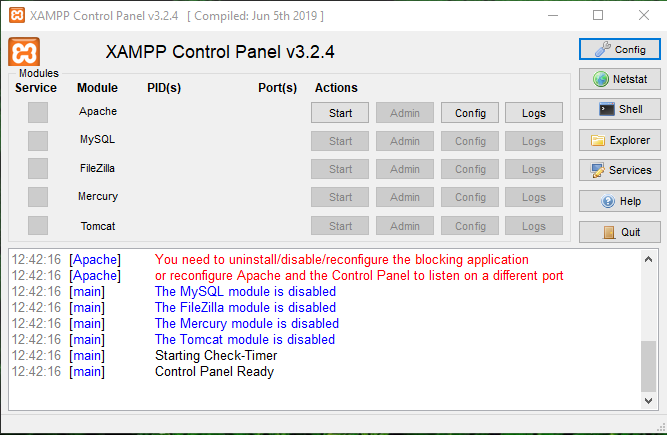
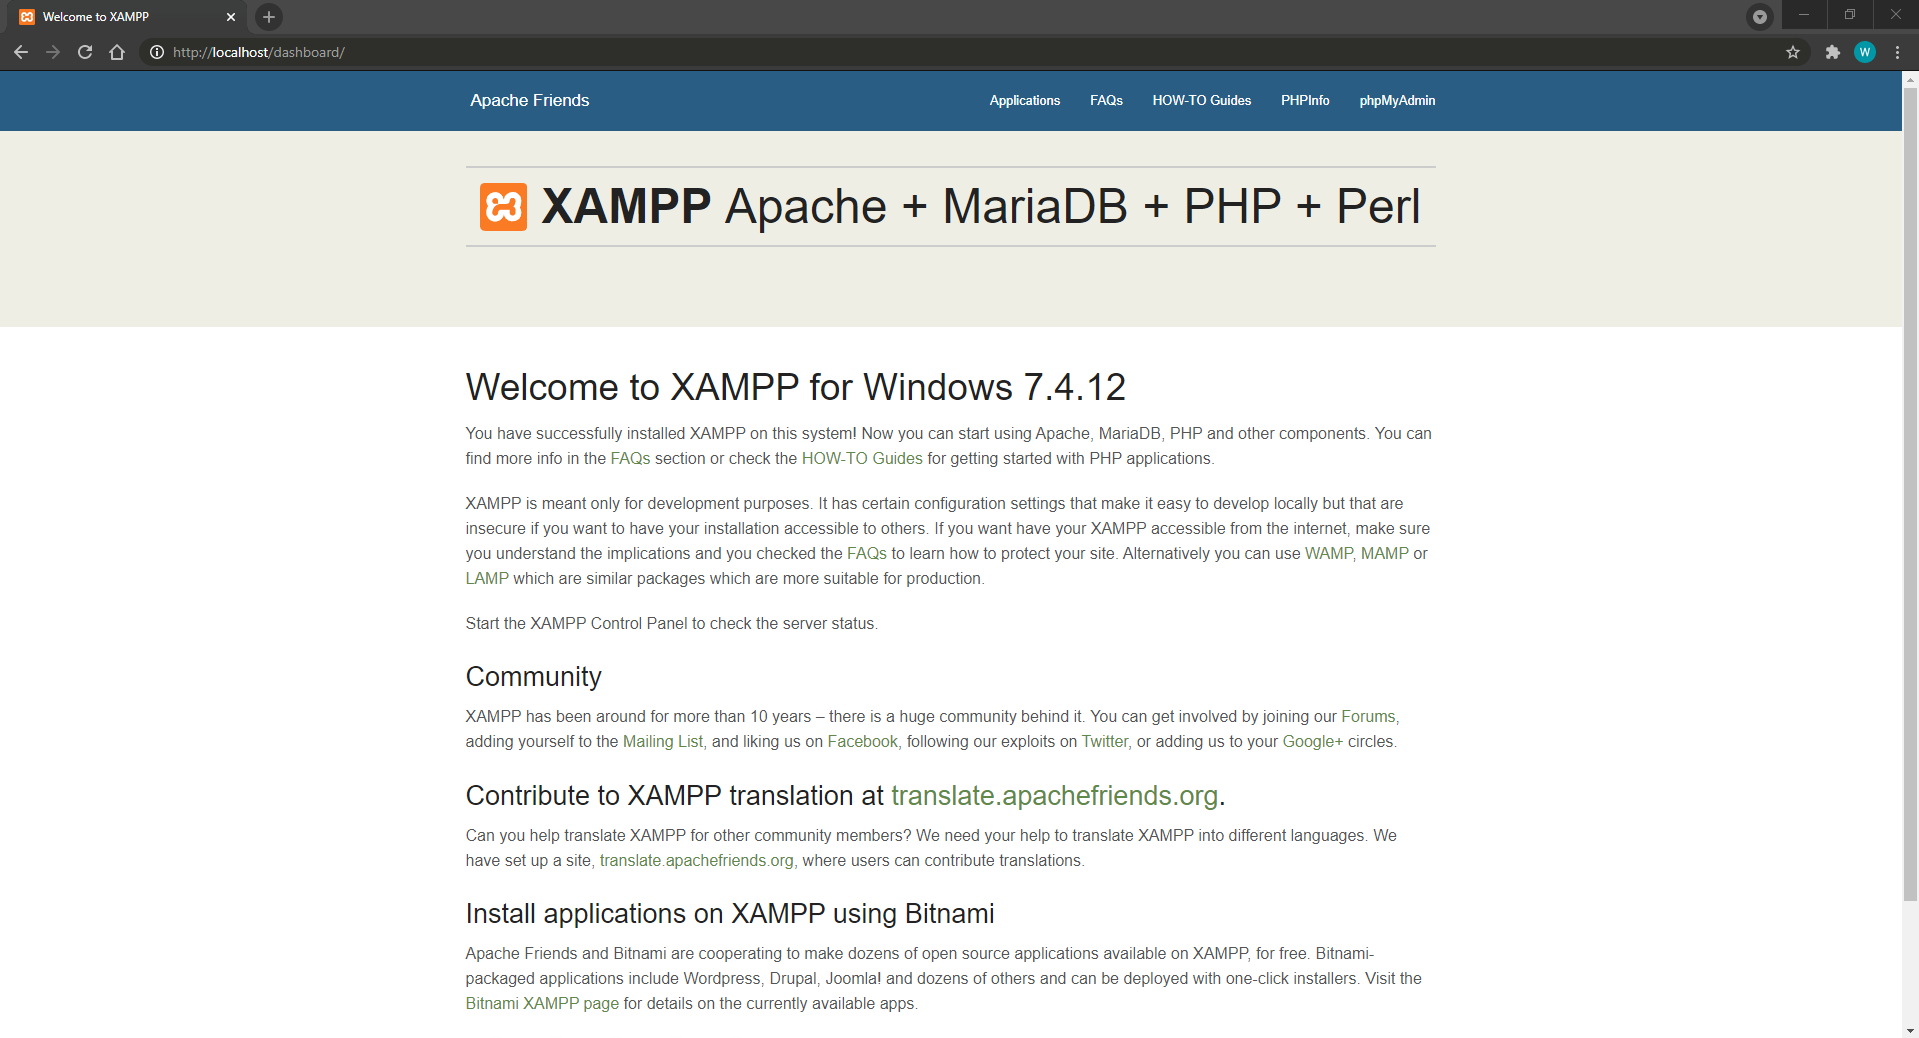
Start the Apache server by clicking the Start button in the actions column. You should make sure no other services are running on ports 80 and 443. Head to your browser of choice and search for localhost. If you have installed and configured XAMPP correctly, you should now be able to see something that looks like this:
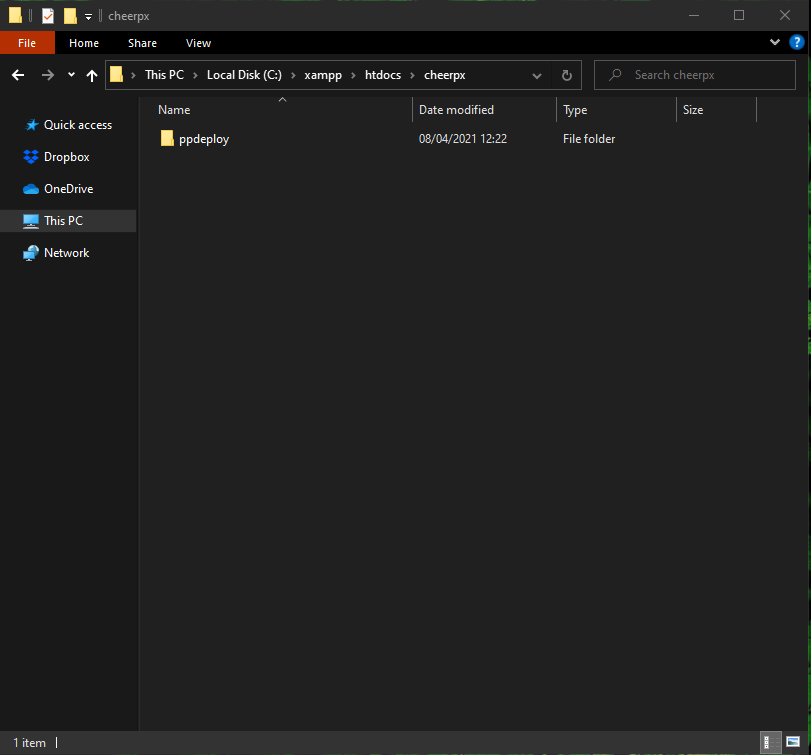
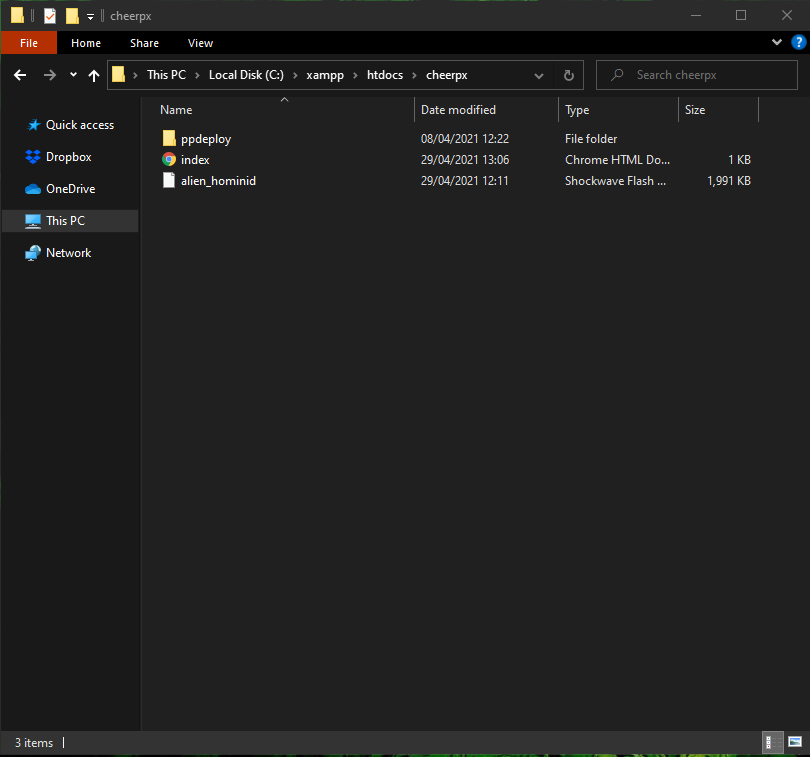
Now, lets add CheerpX to our server. Simply copy the ppdeploy folder we prepared earlier to the location that XAMPP is installed. Head to the xampp\htdocs directory - in our case, C:\xampp\htdocs. You can now create a new cheerpx folder, where all our CheerpX related assets can go. Copy ppdeploy inside here. You should now have something that looks like this:
Confirm that you can now reference your build of CheerpX, by heading to your browser and searching localhost/cheerpx/ppdeploy/pp.js. This should resolve, and show a Javascript file.
Congratulations, you’re now successfully hosting CheerpX for Flash. With some other HTTP server, you may encounter some trouble serving all of our files. For more information, check out our troubleshooting page.
Set up a sample page
We can now prepare a sample HTML page and embed some flash content on it.
First, download some flash content and add it in to our CheerpX folder. In this example, we’ll use a flash game that you can download from this link![]() . Once you have downloaded the
. Once you have downloaded the .SWF file, add it to C:\xampp\htdocs\cheerpx.
You can also add an index.html file, that you can copy down below:
<!doctype html><html lang="en">  <head>    <meta charset="utf-8" />    <title>CheerpX - Flash Demo</title>  </head>
  <body>    <embed src="./alien_hominid.swf" width="600" height="600" />  </body></html>
Your cheerpx folder should now look like this:
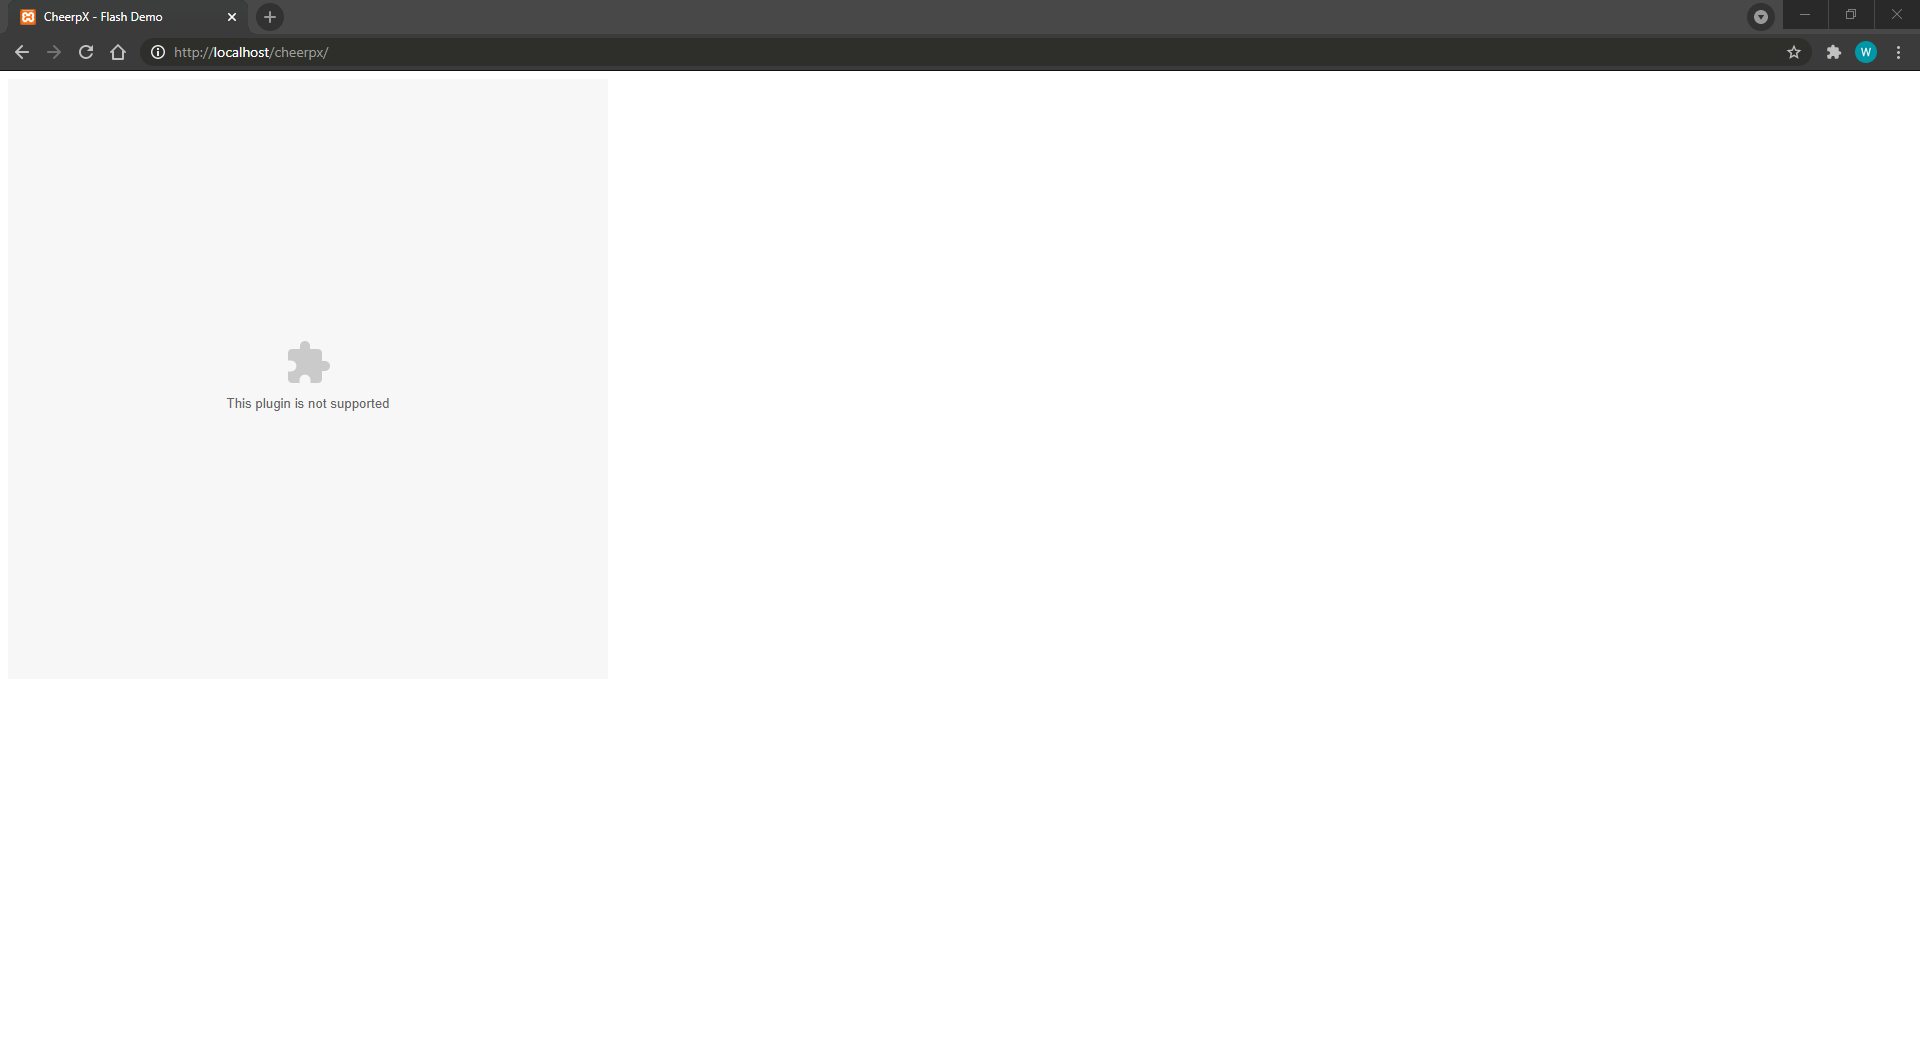
And if you head to localhost/cheerpx/ you should see a page that look like this:
Add CheerpX to your page
CheerpX is very simple to integrate on a normal HTML page, due to it only requiring you to add a small amount of Javascript. In larger applications, this may not be as straightforward, but conceptually, the idea is very simple. We need to:
- Point a
<script>tag at our HTTP hosted cheerpx build. - Call our
ppInitfunction from the Javascript file we referenced above.
To do this, we can simply update our HTML to the following:
<!doctype html><html lang="en"> <head> <meta charset="utf-8" /> <title>CheerpX - Flash Demo</title> <script src="./ppdeploy/pp.js"></script> <script> window.onload = (event) => { ppInit(); }; </script> </head>
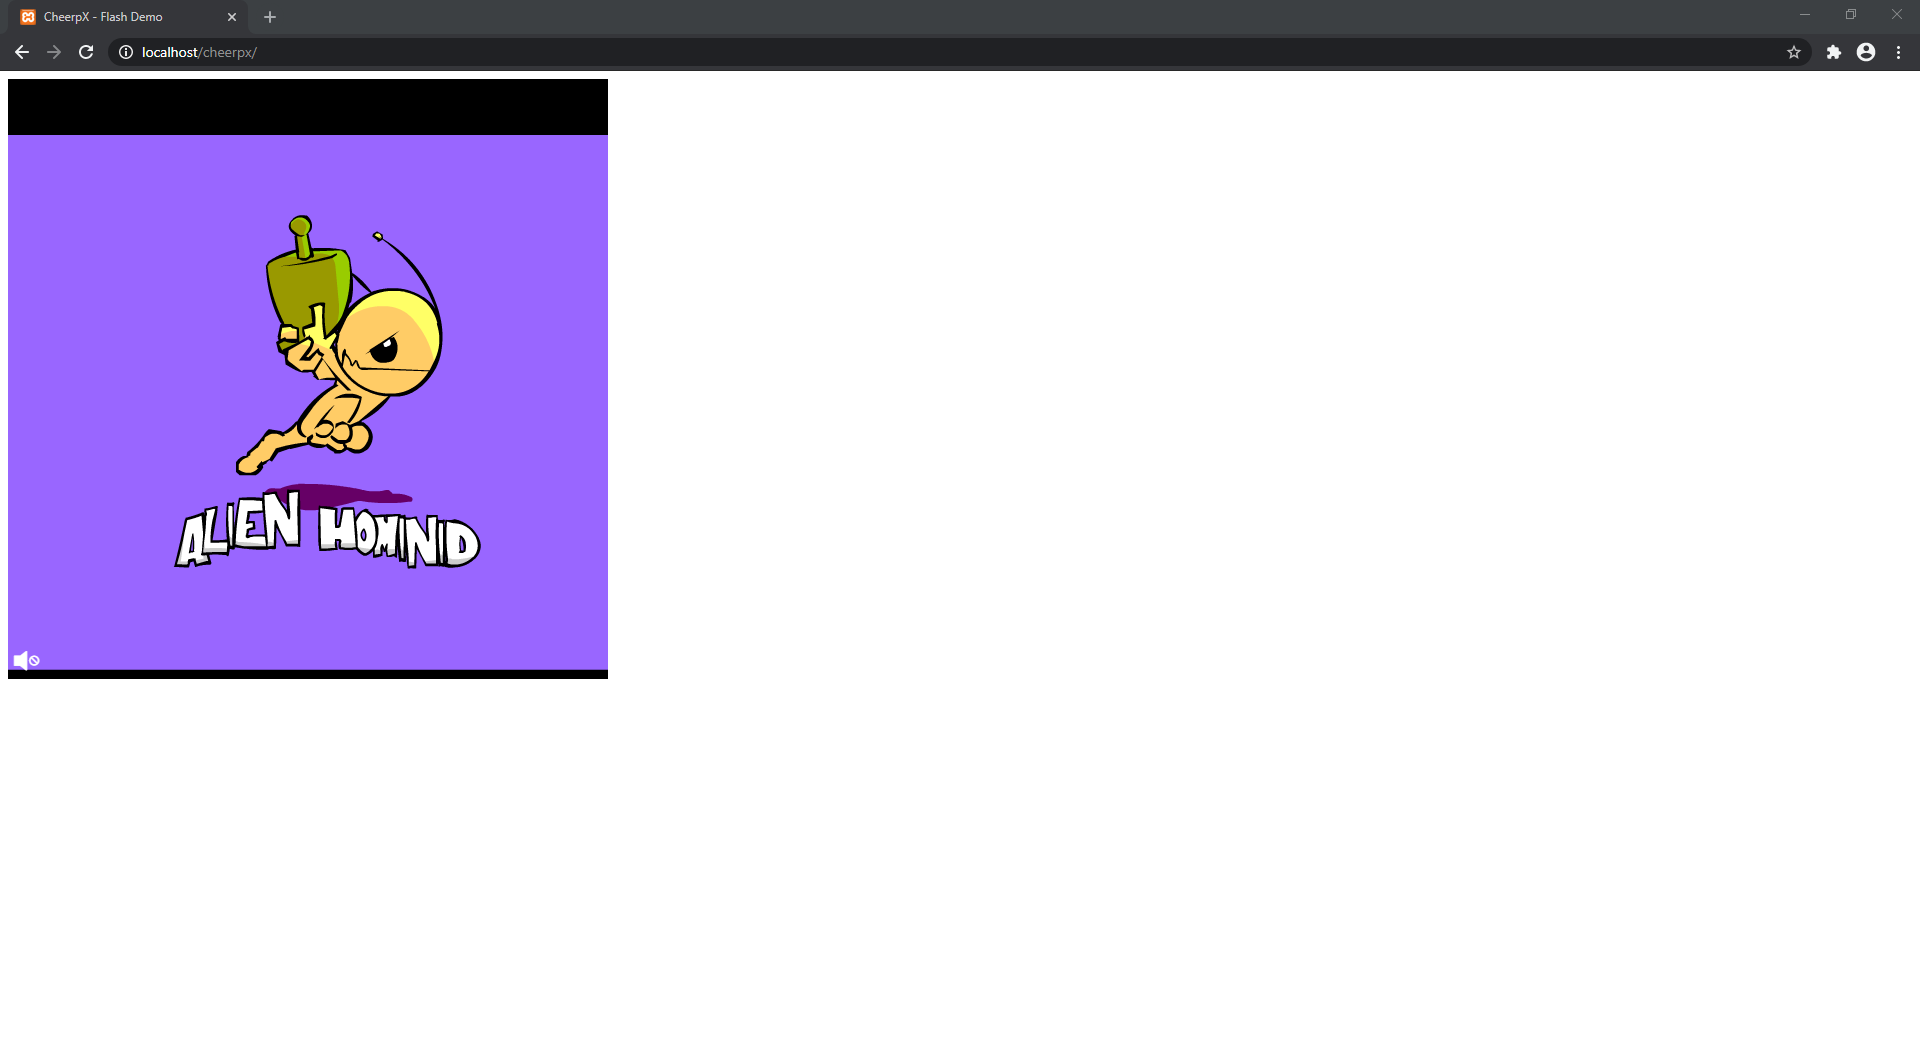
<body> <embed src="./alien_hominid.swf" width="600" height="600" /> </body></html>Now, if we reload the page, we should see our flash content loading:
If you are using a testing/development build of CheerpX for Flash, you may also need to launch your browser using optional WASM flags. This isn’t necessary with production builds of CheerpX for Flash.
(Testing releases only) Run Chrome with flags
We add optional flags to our testing builds to ensure that if there are any compatibilty problems, CheerpX can give us better feedback for debugging.
The flags we need to add are:
--experimental-wasm-return_call--experimental-wasm-compilagtion-hints--experimental-wasm-wasm-branch-hinting
There are a few ways to do this.
-
Launch Chrome from the command line. If you open Windows Powershell as an administrator, the following command (which could need tweaking for your specific installation) should allow you to launch Chrome with the correct flags:
"C:\Program Files\Google\Chrome\Application\chrome.exe" --js-flags="--experimental-wasm-return-call --experimental-wasm-compilation-hints --experimental-wasm-branch-hinting" -
Edit your shortcut to launch with flags. You can also add the same flags to the shortcut directly, which should allow you to run the application as normal, except with flags applied. To do this, you need to:
-
Exit any running instance of Chrome.
-
Right-click on your “Chrome” shortcut.
-
Choose properties.
-
At the end of your “Target:” line add the command line flags.
-
With that example flag, it should look like below:
chrome.exe --experimental-wasm-return-call --experimental-wasm-compilation-hints --experimental-wasm-branch-hinting -
Launch Chrome as normal with the shortcut.
-
For further information, take a look at the official Chromium documentation![]()
The end!
Congratulations, you have successfully installed CheerpX for Flash, and added it to an HTML page. You can now view Flash content in a Flashless browser! For more information, please read our in-depth Getting Started page, or our How It Works page.