
Custom devices
How to create custom CheerpX devices from Docker containers
This guide will show you how to configure a Docker container and build it into an ext2 image for use with CheerpX.
1. Fork the WebVM repository
The easiest cross-platform way to convert Dockerfiles to ext2 images is by using the GitHub Actions infrastructure.
To begin, fork WebVM on GitHub![]() .
.
2. Create a Dockerfile
Create a Dockerfile that installs the software you want to use in your image and save it in your fork. You could do this by going to the dockerfiles directory on the GitHub interface and clicking Add file then Create new file.
For example, the following Dockerfile installs the curl command-line tool:
FROM --platform=i386 i386/debian:busterARG DEBIAN_FRONTEND=noninteractive
RUN apt-get update && apt-get -y upgrade && apt-get -y install curl
Note that the base image’s architecture must be i386 (x86).
3. Run the GitHub Actions workflow
Go to the Actions tab in your fork and select the Deploy action.
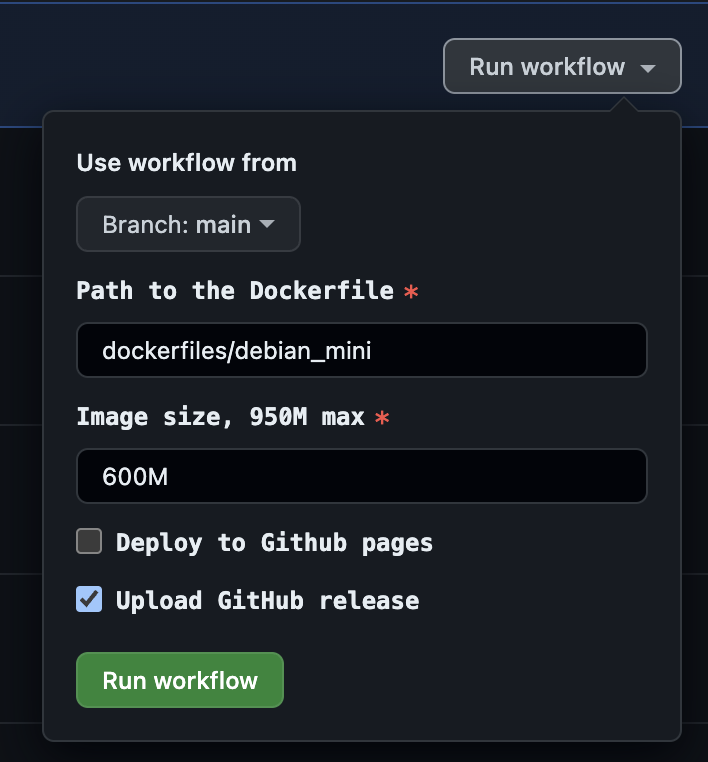
Click Run workflow and fill out the form:
- Update Path to the Dockerfile to the path of the Dockerfile you created in step 2
- Uncheck the Deploy to Github pages checkbox
- Check the Upload GitHub release checkbox
Then click the Run workflow button.
The workflow may take up to 10 minutes to complete depending on the complexity of your Dockerfile.
4. Download the image
The workflow will create a release on the “ext2_image” tag. Under the release assets, download the ext2 file.
5. Serve the image on your web server
Make sure the ext2 file is available on your web server so that CheerpX can access it.
For example, if you’re using Vite, put the ext2 file in the public directory.
6. Add the image as a CheerpX device
Add the image to the devices array in the CheerpXApp.create options object.
For example, if the image was available at /image.ext2, you would add the following to your HTML:
const cx = await CheerpXApp.create({ devices: [ { name: "block1", type: "bytes", url: "/image.ext2", }, ], mounts: [{ type: "ext2", dev: "block1", path: "/" }],});Make sure to use type: "bytes" when hosting your own images.