
Packing the extension in Chrome
Pack the extension into a CRX file in Chrome, to host and deploy it yourself
This page shows how to pack the extension’s files into a CRX file in Chrome, to host it yourself and deploy it through Group Policy.
Prerequisites

- You have the unpacked extension files ready in a directory on your computer.
- Google Chrome is installed on your system.
Step 1: Open Chrome Extensions Settings
Open the Chrome extensions settings by clicking the three dots in the upper-right corner of the Chrome browser, going to Extensions and then selecting Manage Extensions.
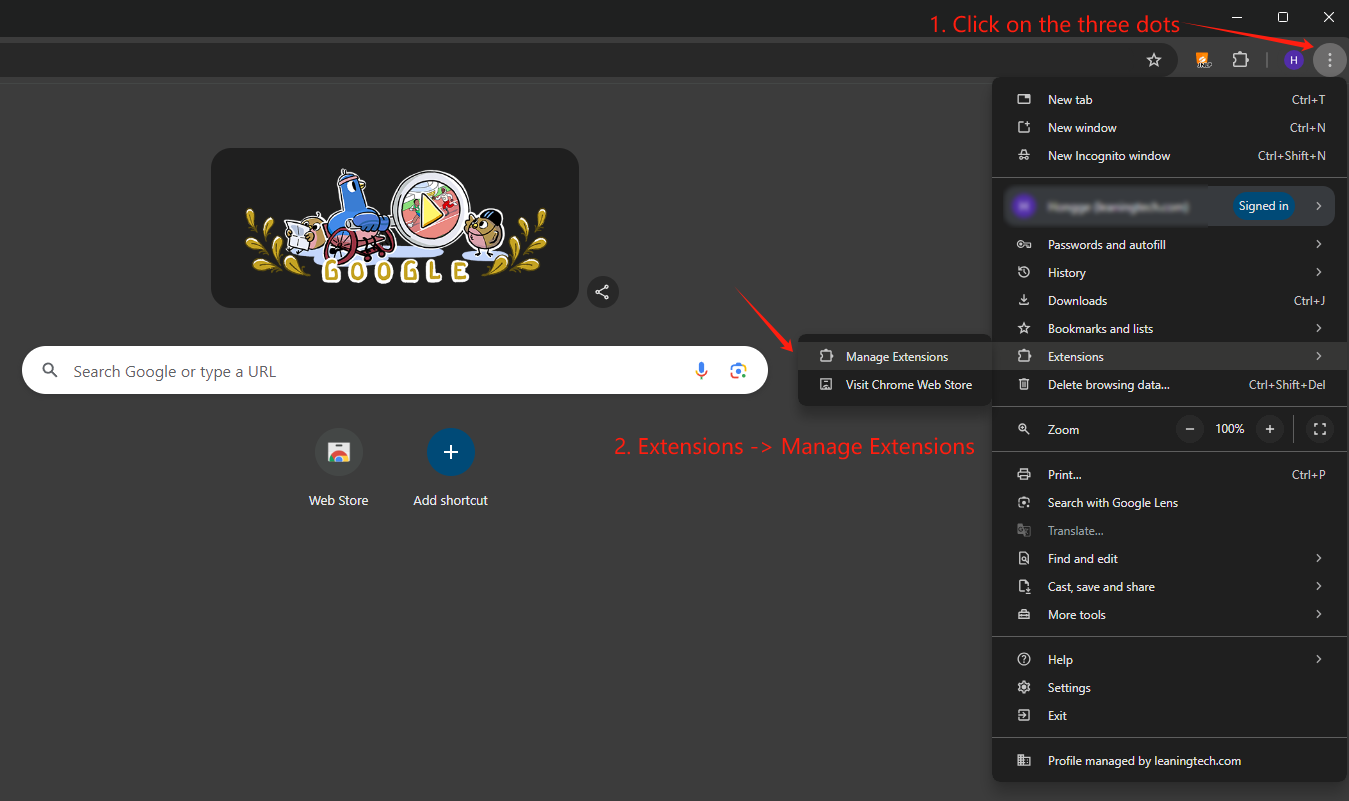
Alternatively, you can type chrome://extensions/ in the address bar to go directly there.
Step 2: Enable Developer Mode
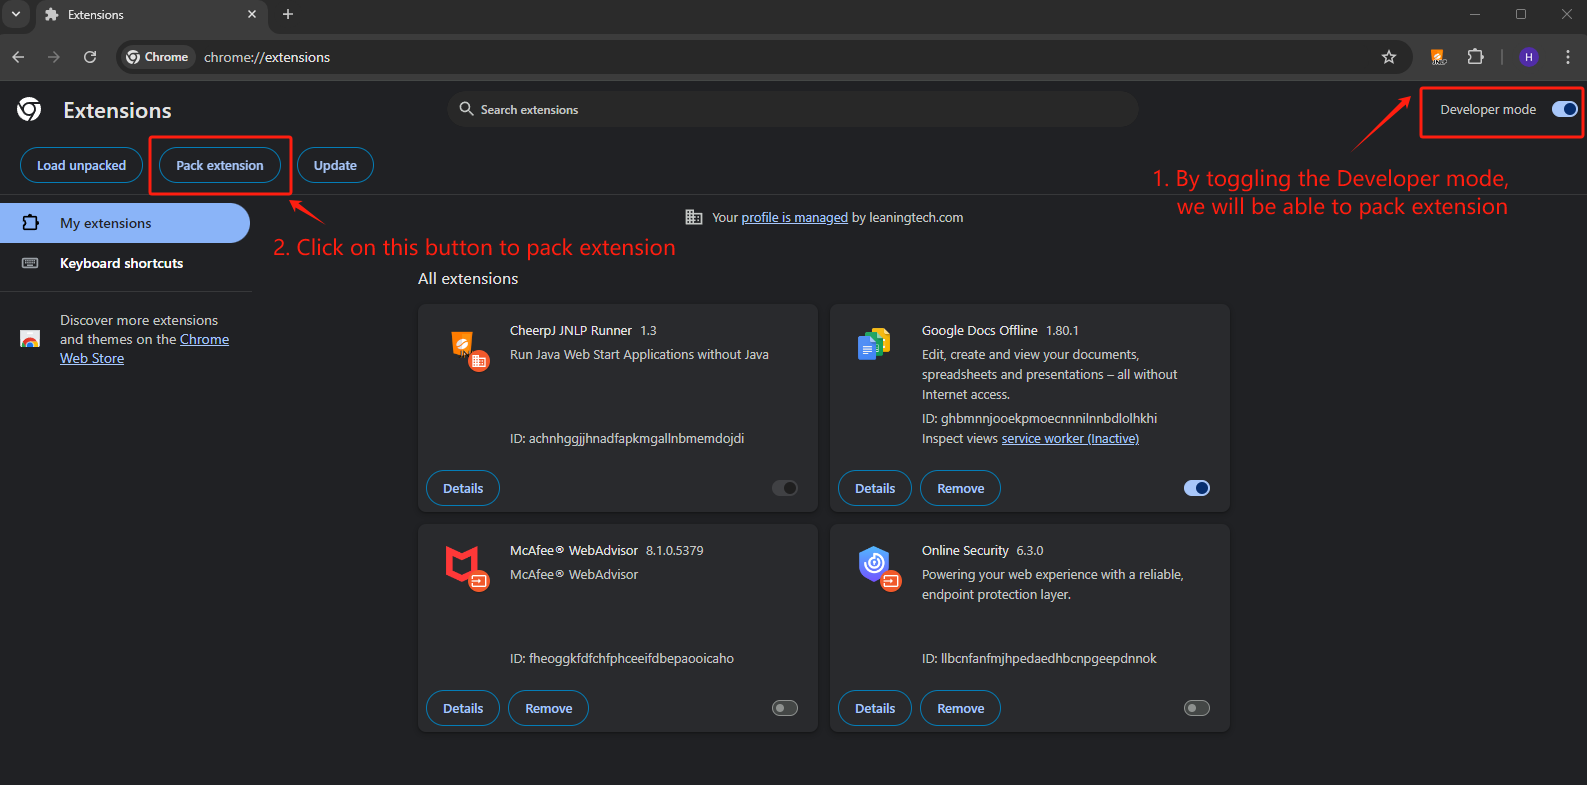
Toggle the Developer mode switch to enable it at the top-right of the Extensions page. This allows you to pack extensions.
Step 3: Pack the Extension
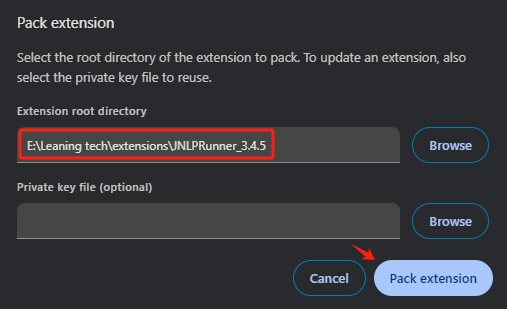
Click on the “Pack extension” button that appears after enabling Developer mode. In the dialog that opens:
- Click “Browse” next to “Extension root directory” and select the folder containing your unpacked extension files.
- Leave the “Private key file” field empty.
- Click “Pack extension”.
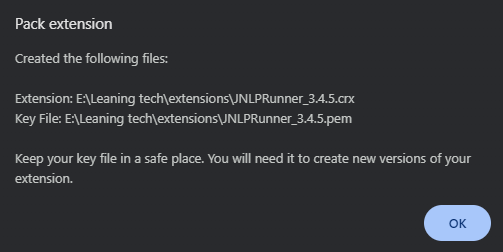
Chrome creates two files in the parent directory of your extension:
- a
.crxfile, the packed extension; - a
.pemfile, the private key. Keep it: you need it to pack an update with the same extension ID.
A dialog will appear confirming the location of these files:
Step 4: Verify the Packed Extension
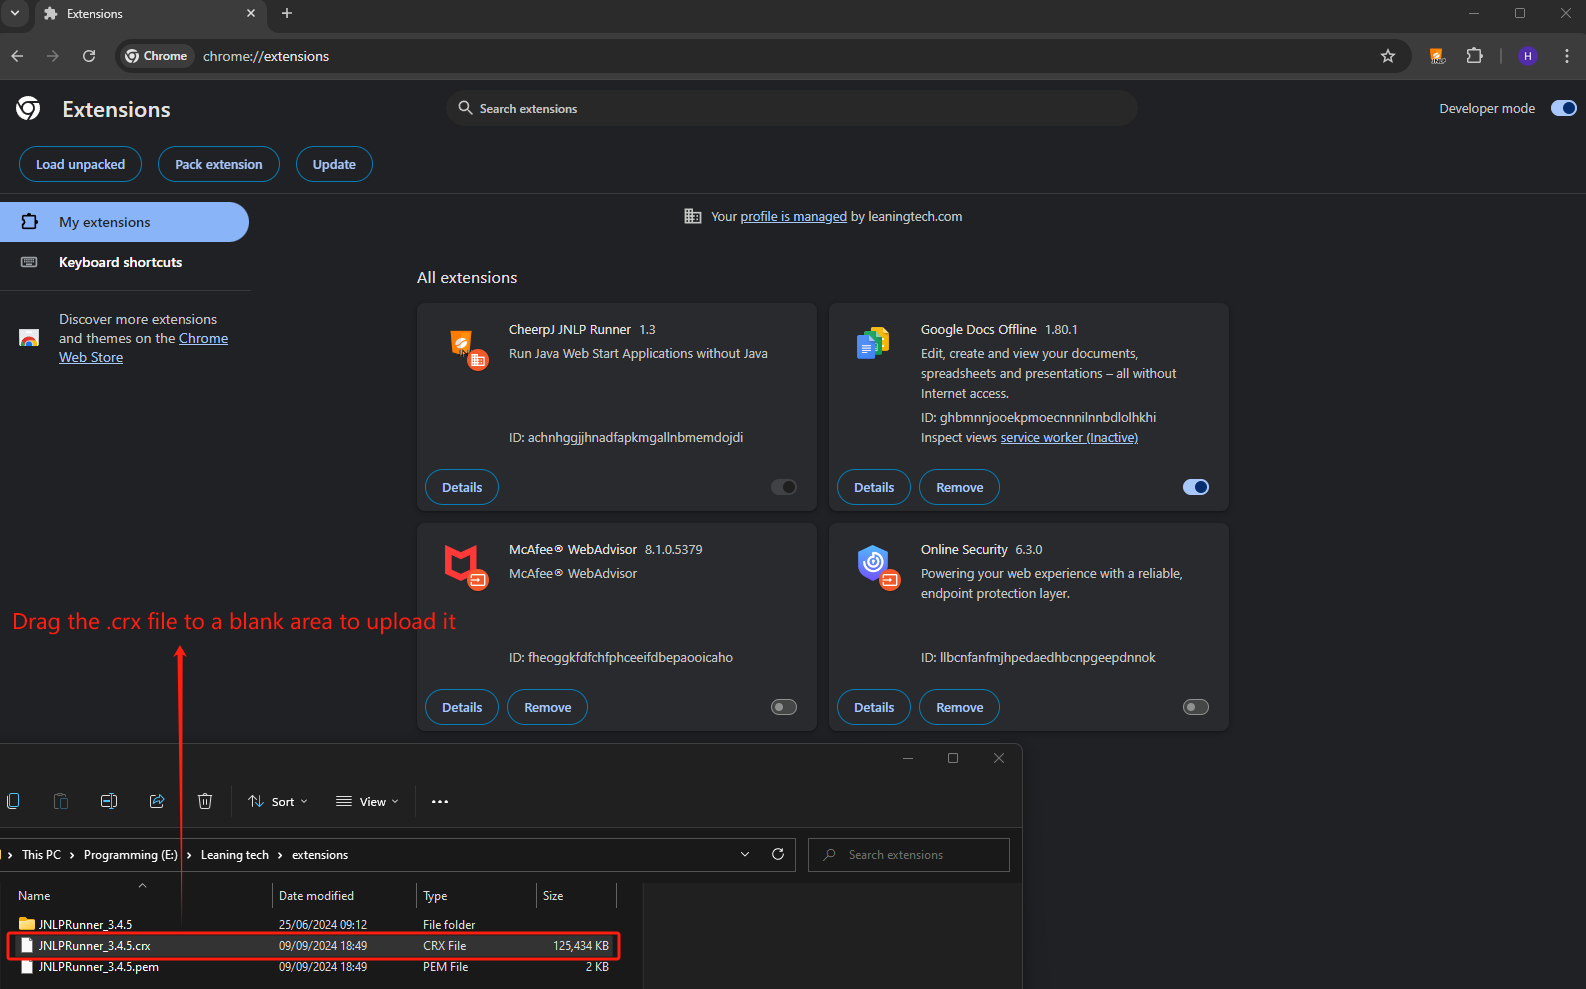
To double check if it worked correctly, you can install the extension by navigating to the folder that contains the .crx file, and dragging it into the extension page to upload it.
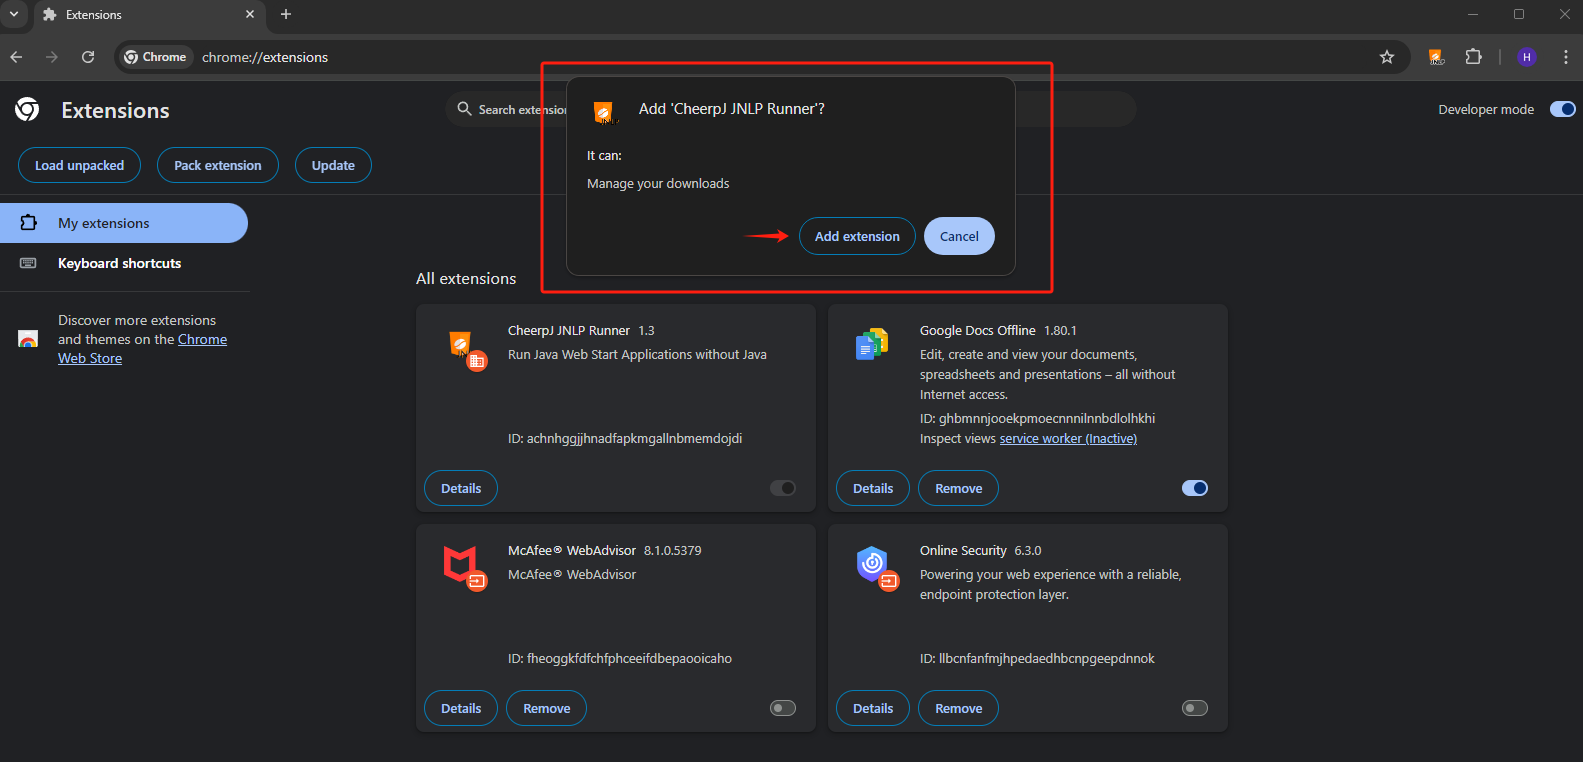
Click on Add extension:
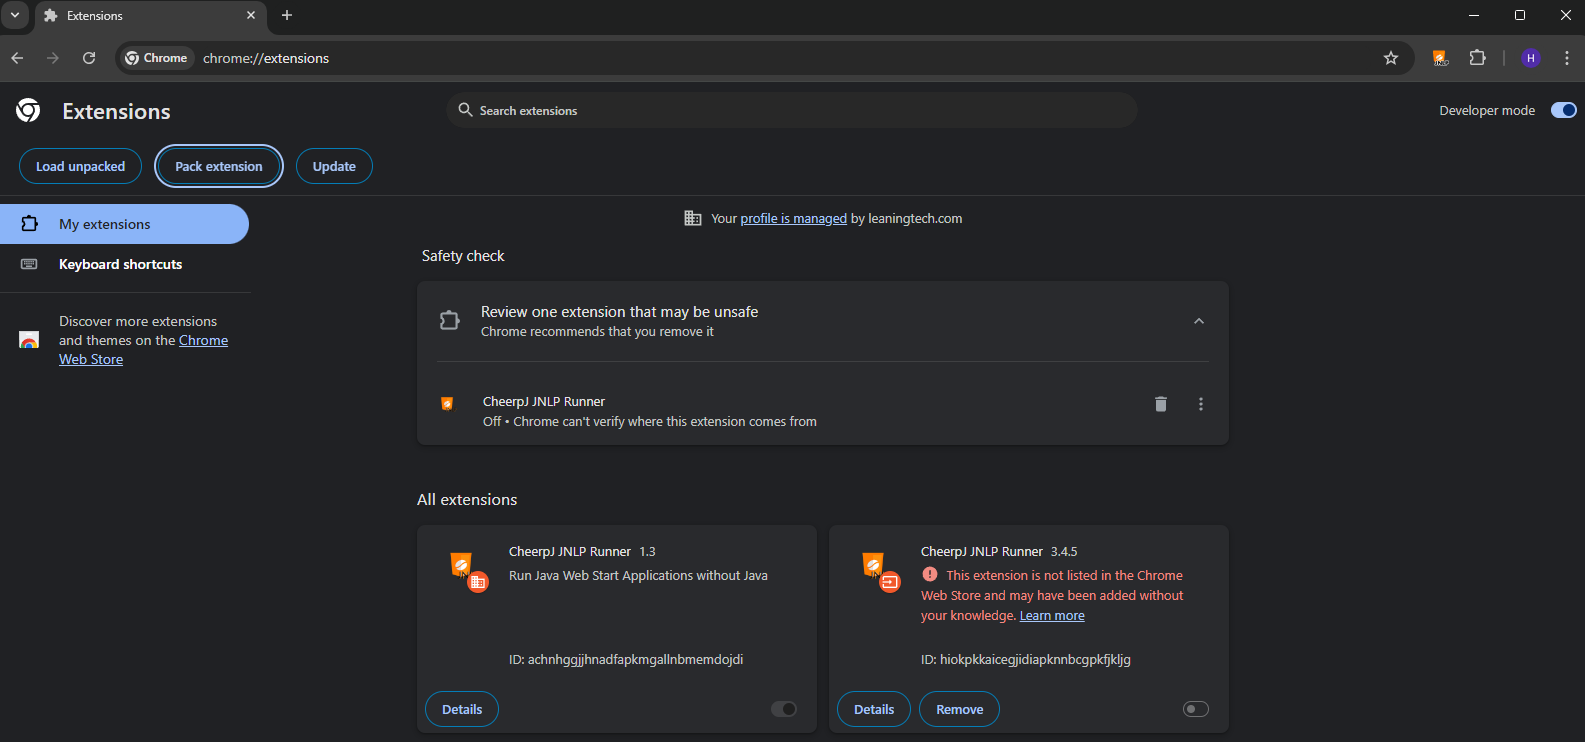
Now you should see the extension has been successfully installed:
The CRX file is ready to host and deploy.